Eurocopter AS 532 U2 Cougar/欧直AS 532 U2美洲狮模型改造
Review&Building report/开盒预览和制作 part2


It is noted first that a description to all the bits and pieces regarding the conversion is nearly impossible. Many many parts were made based on pictures, drawings, estimates and a lot of scratch building.首先要指出,对所有的改造过程进行详细的描述几乎是不可能的。许多零件的制作是基于照片、图纸、估计和东拼西凑来的。
About 50% of the parts could be used in some way of the Puma kits, the rest was scratch.This building report can only show some items. But enjoy!大约50%的零件是美洲豹套材里有的,其余都是和东拼西凑来的。本制作报告只展示了部分物品,但也和大家分享。
Fuselage Conversion机体改造
First, the fuselage had to be lengthened for the Cougar conversion. Measuring the overall fuselage is quite complex. The main dimension to keep in mind is the overall length from nose to tail tip. (see also the drawing on page [1] ). See also page [3] as the tailfin chord is also a bit larger.
首先,美洲狮的机体需要加长。测量整个机体是相当复杂的。要记住机长的主要尺寸是从机鼻到垂尾顶端(可以看第一页的图)。看第三页,垂尾的翼弦也稍大些。
Besides the lengthening, the Dutch Cougar has different windows. Cutting out the various windows and giving them the correct size should now be done and is obviously important. The dimensions of the various windows were determined from the drawing and checking also with the 1/72 Italeri kit. Filing, sanding and cutting was now done at the various fuselage parts. The various windows have raised edges. These were made with metal wire.
除了长机体外,荷兰美洲狮窗户的位置也不相同。把窗户切到合适的大小显然是很重要的。窗户的大小是通过线图确定的,并和意大利72套材做了比对验证。在机体零件上切割,用锉、砂纸打磨完成。窗户边缘的凸起用金属线改造而成。

(The windows were not fitted at this stage; the windows are made from transparant acetate sheet, the various windows cut to size. This is quite a tedious job. They also got a coat of Johnson Future to give some more glass effect on the windows ).
(原套材的窗户透明零件不再适合现在的窗户;用透明的薄塑料片替换,切到窗户的大小。这是个单调的过程。还使用了Johnson Future的透明漆,来给窗户增加更好的玻璃效果)。
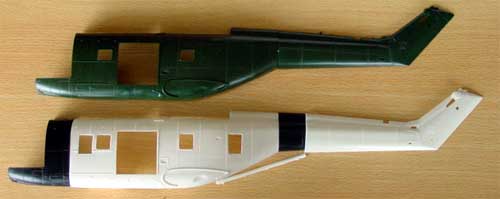
The original Puma fuselage part is seen in green (upper), at the lower in white with 2 extra openings made for additional windows, with stretch sections for the Cougar in black.
上面绿色的是原来美洲豹的机体,下面是延长后的机体,白色机体上增加了两个额外的窗户,黑色是美洲狮机体的延伸部分。
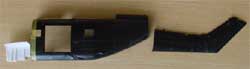
"Left overs" after cutting...切割后剩余的东西……
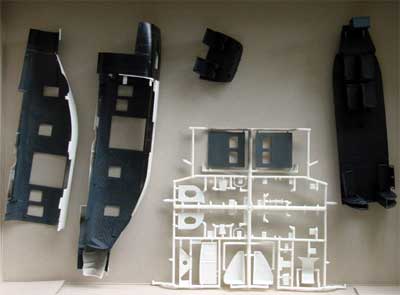
Also, the floor seen right is the extended floor using two floors from 2 kits.
准确的延长地板是用两套套材地板拼出的。
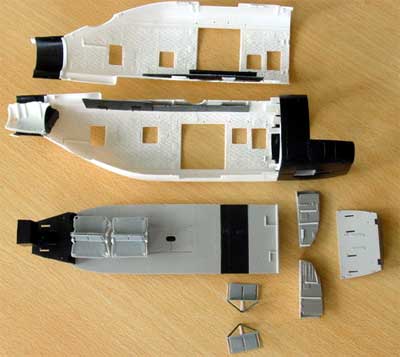
The extened fuselage was now first constructed. As there are two large side doors, adding all the internal details within the cabin is not required at this stage.
现在延长的机身是第一个完成的部件。由于有两个大的侧门,安装机舱内的其他细节并不需要在这个阶段进行。
The extended floor was added, and also a roof added in the upper cabin from card. Also some details at the fuselage cabin sides were added made from plastic strip.
安装上延长的地板,机舱顶部也安装用胶板做的天花板。机舱内侧用塑料条添加一些细节。
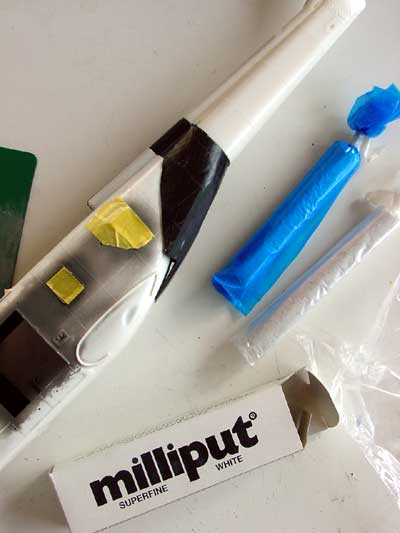
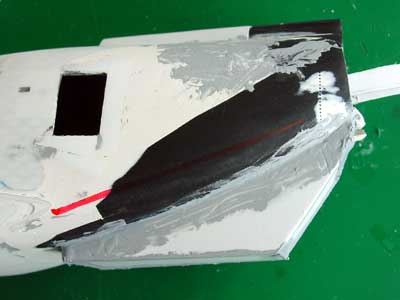
The Cougar has a different and longer rear cone at the rear fuselage as compared to the (Super) Puma. It is the fairing towards the tailrotor boom that needs another extension to make the composite fairing typical for the later Cougar AS 532 variants. Some Puma parts were used with white plasticcard and sprue for strength (see page 1 for dimensions).
美洲狮机体后部的椎体过渡部分和(超)美洲豹不同,更长。这是机身到尾梁的整流罩结构,需要改造成合适后期型美洲狮AS 532的结构。使用部分美洲豹模型本身的零件和白色的塑料胶板搭建(搭建请参考本页第二图),并用了流道来保证强度(长度参考第1页里的线图)。
Milliput was required to get a smooth straight cone shape. A lot of work was needed here. The cone shape is rather straight tapered.
用Milliput牌的环氧补土(国内模型圈里貌似用“AB补土”这个名字比较多)填补打磨成直圆锥形。这需要花很多功夫。这个圆锥比较接近直锥的外形。
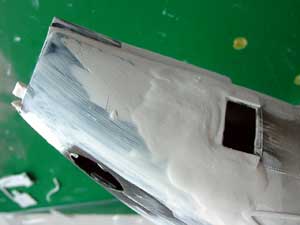

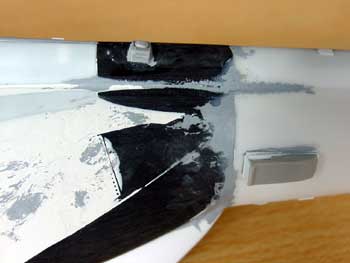
The larger window situated in the cone made things difficult and required some extra plastic strips glued on and sanded in shape.
直圆锥形上的大窗户会比较麻烦,在打磨之前用遮盖胶带遮盖好。
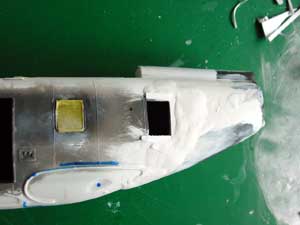
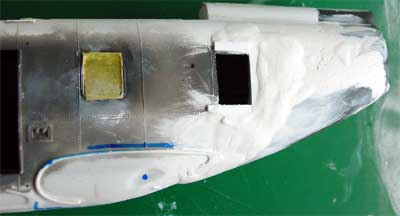
Most of the AS 532 Cougars also have an added fairing with a hatch at the lower side of the cone. So does the Dutch Cougar. This was made from straight card.
多数的AS 532美洲狮在圆锥体下面还安装了一个整流安定面。既然做的是荷兰美洲狮模型,那就用胶板做一个。
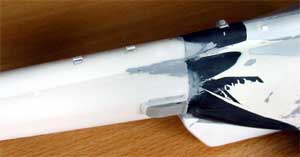
Here, the glued on tailboom can be seen. Internally plastic strip and rod were used to get the necessary strength. Also, an additional small box can be seen added to the side.
现在看到的是安装尾梁,内部使用了胶棒胶条来保证连接强度。还要在底部安装一个小盒子。
Nose cone鼻锥
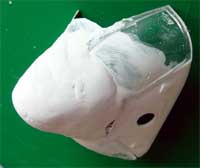
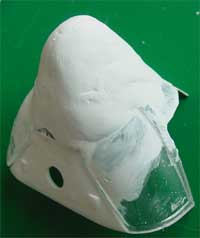
The longer radar nose was moulded from Milliput. The clear cockpit windows were cut off and are to be added later on after the basic model has been correctly shaped.
更长的雷达鼻子是用Milliput补土塑形的。透明的座舱风挡被切开,然后安装在鼻子模型上,用来确保准确的外形。
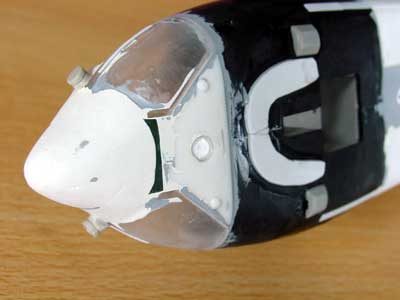
The lower cockpit section can be seen here (after main fuselage assembly) with added fairings and various stubs. Quite some work is needed here to get a smooth result.
机头底部是这样的(安装在机体上以后),已经安装了整流罩和天线。这儿需要花很多功夫来打磨成型。
Thanks the following help on translation. Alphabetical.本页感谢以下人士在翻译上提供的帮助,排名不分先后
swine@SonicModel