Eurocopter AS 532 U2 Cougar/欧直AS 532 U2美洲狮模型改造
Review&Building report/开盒预览和制作 part3


last update 2010.11.07.
Tail area / 尾部
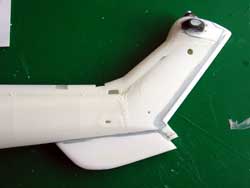
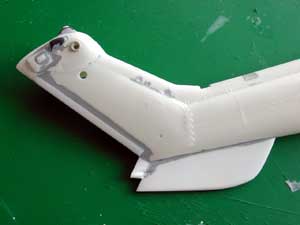
The Cougar vertical tail is much larger than that of the Puma. The chord was extended aft (about 3 mm), bulged fairings were added made from card and Milliput. There is also a large ventral fin and this was made from card. (note: you should account for this when estimating the overall fuselage length)
美洲狮的垂尾比美洲豹的大很多。翼弦后部增加了大约3mm,空隙用胶板和Milliput补土填补。垂尾下方较大的垂直安定面也是用胶板制作的(注意:你要在估算整个机体长度的时候算上这个部分)。
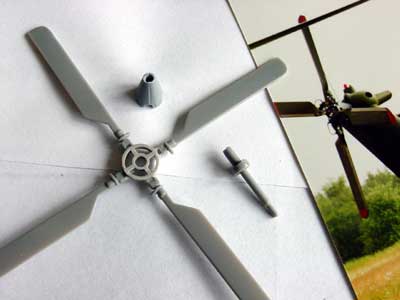
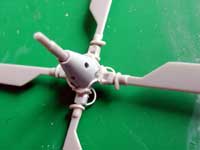
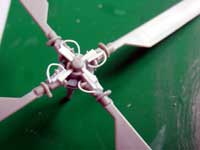
The Cougar tail rotor has only four blades. Using 4 out of the 5 Puma blades , it can be made with some reshaping. As the tailrotor diameter is 15 cm larger than on a Puma (= 5mm in 1/32 scale) , this was achieved through the rotorhub. Also, from an old tank from the spares box, the conical fairing was made.
美洲狮的尾桨只有4叶桨叶,可以在美洲豹的5叶桨基础上改造。尾桨直径比美洲豹大15cm(1/32比例是5mm),通过加长桨觳达到。还从备件箱里找了个副油箱,改造成锥形整流罩。
Also, the horizontal stabilizer of the Cougar got an "reversed slat". Made from card and strip, this was added to the kit's stabilizer.
美洲狮的水平安定面前缘有“向下的框架结构”。用胶板胶条改造出来后安装到套材的安定面上。
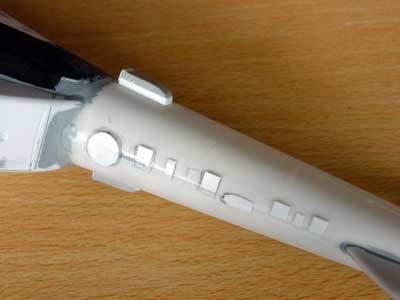
The lower side of the tailboom of the Dutch Cougar has various antennas and smaller fairings. These were made from card and some putty.
荷兰空军的美洲狮尾梁下面还有很多的天线和小整流罩,用胶板和补土做出。
Fairings & floating gear / 主起落架舱整流罩和浮筒
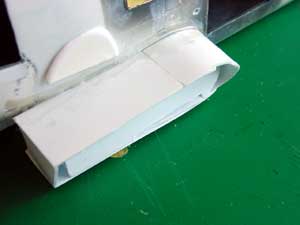
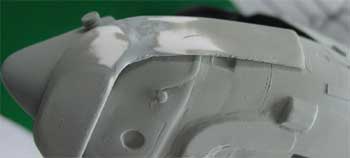
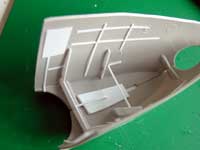
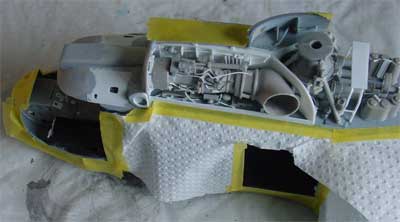
The Dutch Cougars have inter-changeable main gear side sponsons. A smaller variant can often be seen but also the larger type, called the "maritime sponsons" as they heave flotation gear. This larger maritime type was made from plastic card. It has quite a complex shape. As can be seen here, also a metal rod was put through the fuselage that enables some extra strengthening of the main undercarriage legs (to be made later on). Bending, glueing, sanding and shaping was needed. The side sponsons should off course be symmetrical.
荷兰美洲狮主起落架两侧有可拆卸的浮筒设备。虽然经常能看到一种小型的浮筒,但是主要用一种被称为“海事浮筒”的大型浮筒,浮筒上挂着浮力装置。大浮筒用胶板制成。外形比较复杂,如图所示。主起落架支架用金属棍制成,插入到机体内部,这样比较结实(稍后要作出 )。弯曲、粘合、打磨、修整成型。浮筒并非对称的。
Checking was done on the final result with a light grey base coat. 完成后喷浅灰色底色(我们国内模型圈主要用水补土)做检查。
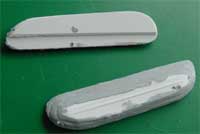
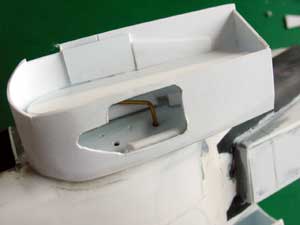
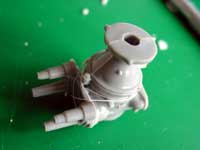
The sponson has a floating gear. This was made as a separate part with several layers of card and putty, sanded to shape.
浮筒的浮力装置,是用多层胶板和补土分开制作的。
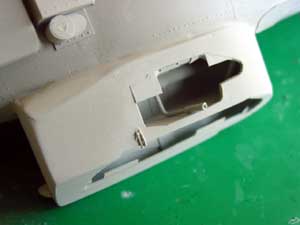
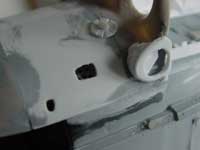
A float gear pack is also present at the lower fuselage nose. This was again made from card and putty. It's shape requires quite some work here.
机鼻下也有浮筒设备,还是用胶板和补土制作,要化很多功夫来修型。
First check/初次检查
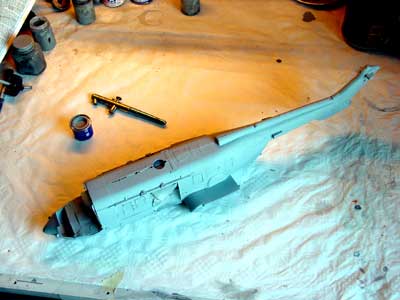
The Cougar is progressing. The engine compartment can be put on later. So the overall fuselage is seen here and got an overall coat of light grey primer (Humbrol 64). All flaws were corrected with putty and sanding... sanding... sanding.
美洲狮继续中,发动机部分稍后再安装。所以现在整个机体喷上浅灰色底漆(亨宝 64号色)检查,所有的瑕疵用补土填补,然后打磨……打磨……打磨。
Engine Compartment/发动机舱
It was decided to also show one engine compartment and the gearbox area. This will add interest to the model.
我决定展示出一个发动机舱和齿轮箱区域。这些细节会给模型增加些趣味。
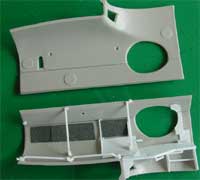
Two models of rear gearbox fairings were made: a normal one, and one with special JDD fairings attached (more on that later....).
我做了两个后方变速箱整流罩,一个是普通的,一个添加了JDD整流罩(后面有更多详情……)。
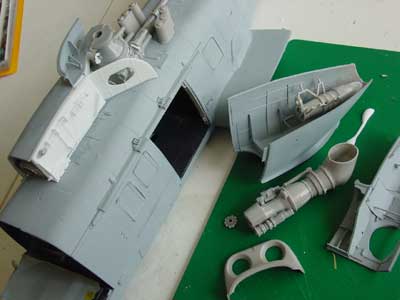
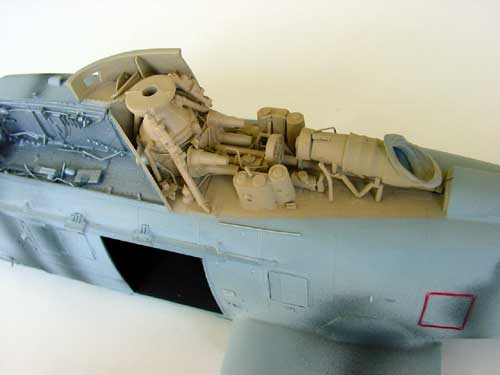
Hatches and sliding fairing can be opened. The basic Puma kit has good parts to start with. A gearbox, engine and various accessoires boxes are provided. Detailling was done with wires, stretch sprue rod, etc. Good pictures are essential.
舱门和滑动整流罩可以打开。美洲豹原套材有很好的零件可以利用。提供了一个齿轮箱,发动机和各种附件箱。用线和拉伸的流道等添加细节。这个步骤需要好的参考图片。
The various basic parts seen above.上图是各种基本零件。
The firewall/ bulkhead was detailled and also note the added details on the slidingrail of the main cabin doors.
The Turbomeca engine parts with the aft APU were further detailled.
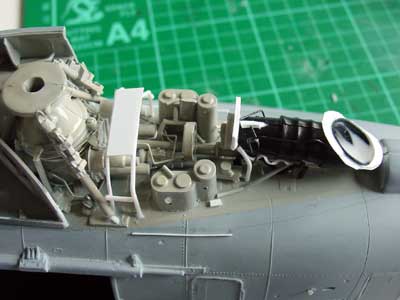
(note: the rotor gear box bridge for maintenance as made and shown here is not symmetrical... it will be replaced later on).
The engine door at the left side will be kept detachable. It has a kink with a working platform for maintenance crew. This was all made with sprue and card.
Next, lets look at the接下来,是
Cockpit fuselage area./座舱部分
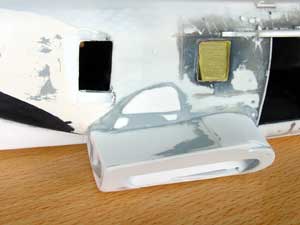
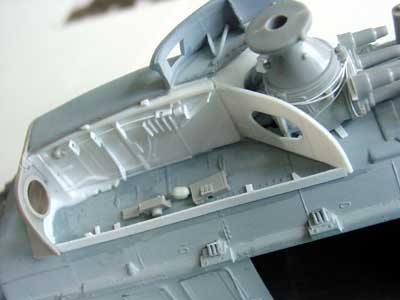
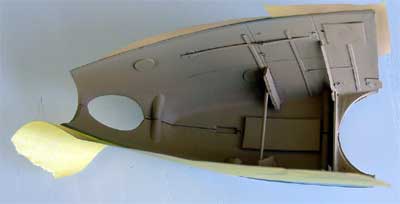
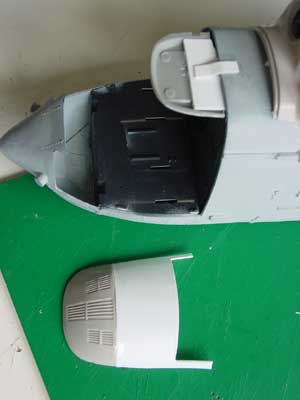
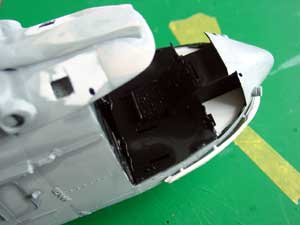
First was the addition of the cockpit roof. This required a longer roof that was made from card. Fortunately the Revell Puma kits were issued with the intake filters (called MPAI Multi purpose air intake) to be set in front of the actual engine intakes as seen on Dutch Cougars.
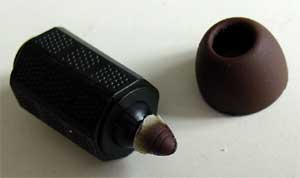
The intake filter have inner nose cone. These were made from the tip of spare 'bombs'. These cones can move and close or open the intake. The positions vary depending on the pilot controls. The intakes may be seen with different left and right openings.
The roof was faired in with some putty. It was assured that later on the clear cockpit windows and doors can be added later on. (note: Cockpit detailling will be considered later on)
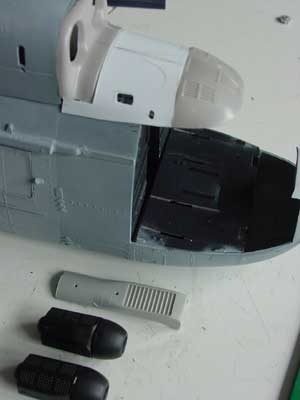
There are also air intake compressors near the sides of the engine intakes. These were made from some card. The fans were made from very thin card with cuts made for each blade.
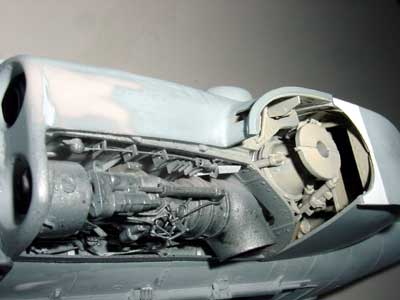
The engine section got a coat of silver and the aft and inner areas a buff color
(The ladder bridge was removed and a replacement fitted later on)
The aft part is the APU with its exhaust, this will hardly be seen with the aft fairing slided aft.
后部是APU和排气口,这个部分关闭整流罩后很难看到。